The Best Way to Display Photos - Transform Your Home with Creative Gallery Ideas
Published: 22 July 2025
Picture this: you've got boxes of photos gathering dust in the loft, thousands more trapped on your phone, and walls that look like they belong in a show home – pristine, perfect, and utterly soulless. Sound familiar?
Here's the truth nobody tells you: displaying photos isn't just about filling blank walls. It's about surrounding yourself with the moments that matter, creating a home that actually feels like your home. Whether you're after Instagram-worthy gallery walls or just want to finally do something with those wedding photos from 2019, I'm going to show you exactly how to transform your space with creative photo displays that'll have visitors asking "who's your interior designer?"
Spoiler alert: it'll be you.
Why Photo Displays Matter More Than You Think

The Psychology Behind Personal Displays
There's proper science behind this, you know. Studies show that looking at photos of loved ones actually reduces stress and increases happiness. It's not just decoration – it's daily therapy that costs nothing once it's up.
But beyond the feel-good factor, photo displays serve as:
- Conversation starters (goodbye awkward silences)
- Memory anchors (especially important as we age)
- Identity markers (this is who we are)
- Creativity outlets (your walls, your rules)
The Modern Display Dilemma
The challenge today isn't lack of photos – it's the opposite. We're drowning in digital images whilst our walls stay bare. The average Brit takes 900 photos a year but prints approximately... none. Mental, isn't it?
That's where smart display strategies come in. You don't need to print everything (your bank account will thank you), but choosing and displaying the right photos transforms a house into a home faster than any paint colour or throw pillow ever could.
Choosing Your Display Method: From Classic to Cutting-Edge

Traditional Frames: The Classics Never Die
Let's start with what works. Traditional frames get a bad rap for being boring, but done right, they're anything but:
Single Statement Pieces:
- One large frame (think A2 or bigger)
- High-impact photo (landscapes, portraits)
- Quality matting makes all the difference
- Perfect for: above sofas, bedroom walls, hallways
Multi-Photo Frames:
- Built-in collage effect
- Uniform look without the measuring
- Great for themed collections
- Ideal for: family chronologies, travel memories
Mix-and-Match Frames:
- Different sizes, same colour family
- Or same size, different colours
- Creates visual interest
- Works everywhere
Modern Alternatives That Actually Look Good
Floating Shelves:
- Swap photos without new nail holes
- Layer different sizes for depth
- Mix photos with small plants or objects
- Perfect for renters
Wire Grid Systems:
- Industrial chic vibes
- Clips or pegs for easy changes
- Instagram-worthy backdrop
- Great for: home offices, teenagers' rooms
Clipboards or Bulldog Clips:
- Ridiculously simple
- Surprisingly stylish
- Change photos in seconds
- Ideal for: kitchens, kids' artwork
Digital Displays: Welcome to the Future

Gone are the days of naff digital frames with terrible resolution. Modern options include:
Smart Digital Frames:
- WiFi-enabled for remote updates
- HD or 4K resolution
- Video capability
- Some sync with your phone gallery
Tablet Displays:
- Old iPads make brilliant photo frames
- Slideshow apps with transitions
- Wall-mountable with special brackets
- Perfect for tech-savvy households
TV Gallery Mode:
- Many smart TVs have art modes
- Display photos when not watching
- Massive impact for minimal effort
- Great for: statement walls
Pik.so's printing service bridges the gap perfectly – high-quality prints from digital files, so you get the best of both worlds.
Mastering the Photo Gallery Wall
Planning Your Gallery Wall Layout
The photo gallery wall – it's the Mount Everest of home décor. Looks effortless when done well, absolute chaos when it goes wrong. Here's how to nail it:
The Paper Template Method:
- Cut paper to match frame sizes
- Arrange on floor first
- Tape to wall with masking tape
- Play with layouts risk-free
- Mark nail positions through paper
Popular Gallery Wall Layouts:
The Grid:
- Same-sized frames in perfect rows
- Modern, clean, organised
- Best for: minimalist homes
Salon Style:
- Mixed sizes, organic arrangement
- Start with largest piece off-centre
- Build outwards
- Perfect for: eclectic collections
The Line:
- Frames aligned along invisible line
- Top edges, bottom edges, or centres
- Creates order within chaos
- Great for: hallways, staircases
Measuring and Spacing Secrets
The Magic Numbers:
- 57-60 inches: centre height from floor
- 2-3 inches: between smaller frames
- 3-5 inches: between larger pieces
- 6-8 inches: above furniture
Pro tip: Use a laser level. Seriously. £20 from B&Q and you'll look like you know what you're doing. Because you will.
Theme Building Without Going Overboard
Cohesion Strategies:
- Stick to 2-3 frame colours max
- Use consistent matting
- Apply same filter to all photos
- Mix subjects but maintain mood
Popular Gallery Wall Themes:
- Black and white family portraits
- Travel adventures (maps included)
- Nature and landscapes
- Mixed media (photos + art + objects)
Materials and Photo Preservation (The Stuff Nobody Talks About)

Frame Materials That Last
Wood Frames:
- Classic, warm, versatile
- Solid wood vs MDF (budget matters)
- Stain or paint to match décor
- Best for: traditional homes
Metal Frames:
- Modern, sleek, minimal
- Aluminium (lightweight) vs steel (sturdy)
- Usually black, silver, or gold
- Perfect for: contemporary spaces
Acrylic/Frameless:
- Photos appear to float
- Very modern aesthetic
- Lightweight and safe
- Ideal for: minimalist designs
Protecting Your Precious Memories
Here's what nobody tells you: that sunny spot perfect for your gallery wall? It's also perfect for fading your photos into oblivion.
UV Protection is Essential:
- UV-protective glass or acrylic
- Costs more but photos last decades
- Essential for: valuable or irreplaceable photos
- Worth it for windows and bright rooms
Acid-Free Everything:
- Mounts, backing boards, adhesives
- Prevents yellowing and deterioration
- Standard in quality framing
- Non-negotiable for precious photos
Climate Considerations:
- Avoid bathrooms (humidity)
- Keep away from radiators
- Consider sealed frames for kitchens
- Use copies for high-risk areas
Lighting Your Photos Like a Pro
Natural Light: Free but Tricky
Working with Windows:
- North-facing: consistent, no direct sun
- South-facing: bright but risky for fading
- East/West: beautiful golden hours
- Solution: UV glass and strategic positioning
Artificial Lighting That Works
Picture Lights:
- Classic gallery look
- Battery or wired options
- Adjustable beam angles
- Perfect for: statement pieces
LED Strip Lights:
- Hidden behind frames
- Creates floating effect
- Affordable and easy
- Great for: modern displays
Spotlights:
- Track or individual
- Adjustable positioning
- Museum-quality results
- Ideal for: serious collections
Smart Bulbs:
- Adjust colour temperature
- Dim for ambiance
- Schedule for impact
- Perfect for: tech lovers
Advanced Design Tips from the Pros
Mixing Prints for Maximum Impact
Matte vs Glossy: The Eternal Debate
The answer? Both. Here's when to use what:
Matte Prints:
- No glare issues
- Sophisticated, gallery feel
- Fingerprint resistant
- Best for: black and white, portraits
Glossy Prints:
- Colours pop dramatically
- Sharp, crispy details
- Modern, vibrant look
- Perfect for: landscapes, bright colours
The Secret: Mix them strategically. Matte for people, glossy for places. Creates subtle visual variety.
Combining Different Media
Don't limit yourself to photos:
- Mix in artwork or prints
- Add dimensional objects (keys, tickets)
- Include mirrors for light and space
- Incorporate meaningful quotes
Pik.so's printing options include various finishes and sizes, perfect for creating diverse gallery walls.
Colour Coordination Without the Headache
The 60-30-10 Rule:
- 60% dominant colour (often neutrals)
- 30% secondary colour
- 10% accent colour
Applied to Photo Displays:
- 60% similar toned photos
- 30% complementary shades
- 10% pop of unexpected colour
Your Step-by-Step Hanging Guide

Essential Tools (The Absolute Minimum)
- Hammer (obviously)
- Tape measure (non-negotiable)
- Pencil (not pen!)
- Level (phone apps work in a pinch)
- Wall anchors (for heavy frames)
- Stud finder (for really heavy frames)
The Foolproof Hanging Process
Step 1: Prep Your Wall
- Clean the surface
- Check for cables/pipes
- Locate studs if needed
Step 2: Mark Your Territory
- Use templates or measure carefully
- Mark lightly with pencil
- Double-check with level
Step 3: Choose Your Hardware
- Picture hooks: up to 20kg
- Wall anchors: plasterboard heroes
- Screws into studs: heavyweight champions
Step 4: Hang with Confidence
- Start with centre/largest piece
- Work outwards systematically
- Step back frequently
- Adjust as needed
Damage-Free Options for Renters
Command Strips:
- Follow weight limits religiously
- Clean wall first
- Press firmly for 30 seconds
- Wait an hour before hanging
Picture Ledges:
- Minimal holes needed
- Flexible arrangements
- Mix photos with objects
- IKEA does great affordable ones
Lean and Layer:
- No holes at all
- Sophisticated look
- Use mantels, consoles, floors
- Perfect for large pieces
Creative Display Ideas by Room
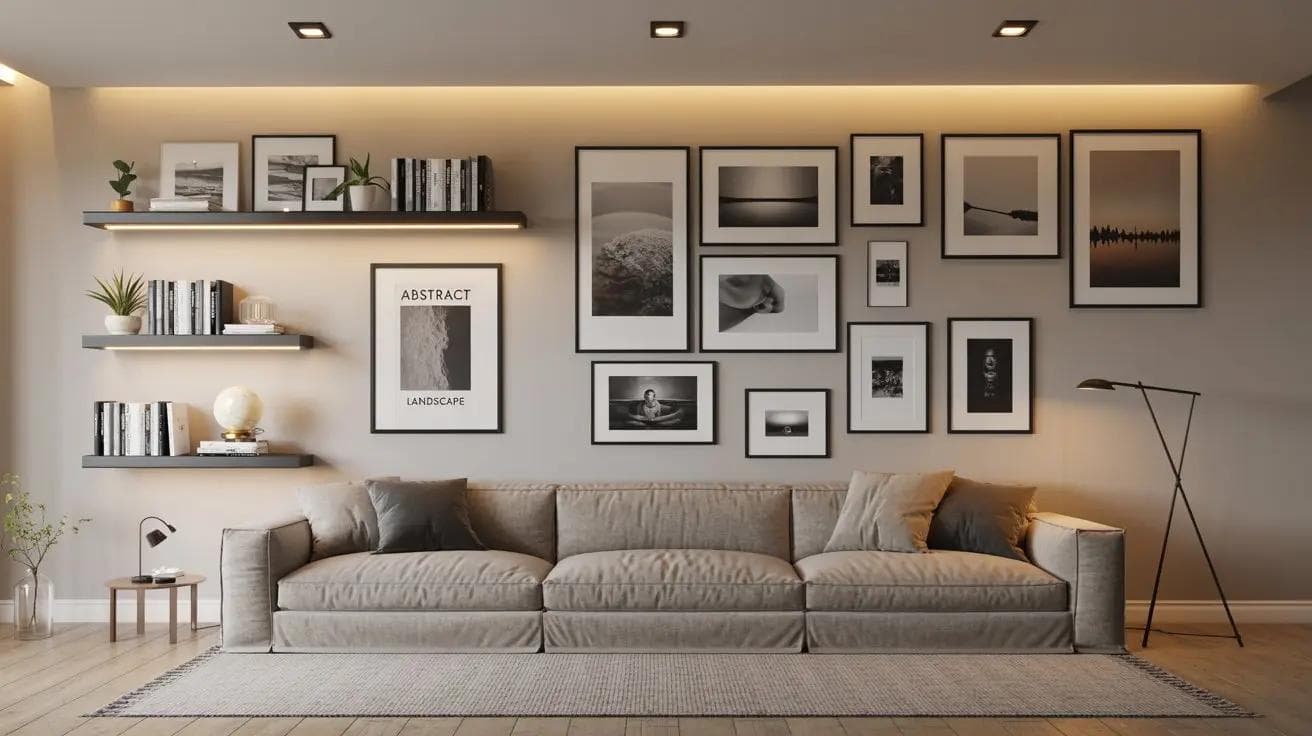
Living Room: The Social Showcase
- Gallery wall above sofa
- Floating shelves for flexibility
- Mix family photos with art
- Consider scale – go big
Bedroom: Personal Sanctuary
- Intimate photos only
- Soft lighting essential
- Above headboard or dresser
- Consider removable options
Kitchen: The Heart of the Home
- Recipe cards mixed with photos
- Clipboards for easy changes
- Avoid above hob (grease)
- Fun, casual arrangements
Hallway: The Journey
- Chronological family timeline
- Travel photo collection
- Mix heights for interest
- Good lighting crucial
Home Office: Motivation Station
- Achievement photos
- Vision board elements
- Easy-change systems
- Keep it professional-ish
Your Burning Questions Answered
"How do I display photos without damaging walls?" Command strips for lighter frames, picture ledges for flexibility, or simply lean larger pieces against walls on furniture. For heavier items, one properly-placed screw does less damage than multiple failed attempts with inadequate hardware.
"What is the best layout for a photo wall display?" Depends on your style and space. Grids work for modern minimalists, salon style suits eclectic collectors, and linear arrangements perfect for hallways. Start with paper templates to find what feels right.
"How can I create a cohesive gallery wall theme?" Stick to consistent frame colours (2-3 max), use similar matting throughout, apply the same filter/editing style to all photos, or choose a unifying subject matter. Consistency in any one element creates cohesion.
"Is it better to print photos in matte or glossy finish?" Matte for anything behind glass (no glare), handling frequently (no fingerprints), or displaying black and white photos. Glossy for vibrant colours, fine details, and modern aesthetic. Mix both for visual interest.
"Why are my photos fading and how can I prevent it?" UV light is the culprit – from sun and even some indoor lighting. Prevent with UV-protective glass, keeping photos away from direct sunlight, using copies for sunny spots, and rotating displays occasionally.
Modern Tech Meets Traditional Display
Smart Frame Integration
The future is here, and it's rather brilliant:
- Email photos directly to frames
- Family members contribute remotely
- Schedule different photos for different times
- Video memories included
Apps That Help
Planning Apps:
- Wall Art Planner (iOS/Android)
- Artfully (gallery wall simulator)
- Canva (for digital layouts)
Photo Editing:
- VSCO for consistent filters
- Snapseed for detailed edits
- Layout for quick collages
The Hybrid Approach
Mix digital and physical:
- Digital frame for recent photos
- Printed classics for permanence
- Rotate seasonally
- Best of both worlds
Making It Happen: Your Action Plan

This Weekend's Project
- Saturday Morning: Audit your photos (digital and physical)
- Saturday Afternoon: Choose your heroes (20-30 max)
- Sunday Morning: Shop for frames/supplies
- Sunday Afternoon: Create your display
Budget-Friendly Tips
- Charity shops for unique frames
- IKEA for bulk buying basics
- Pik.so for quality prints at fair prices
- DIY matting saves fortunes
- Sales in January and July
The Maintenance Reality
- Dust monthly (boring but necessary)
- Rotate seasonally (keeps things fresh)
- Update occasionally (not constantly)
- Enjoy daily (the whole point!)
Time to Transform Your Space
Right, enough reading. Your walls are waiting, and those photos aren't going to display themselves. Whether you go full gallery wall or start with a single statement piece, the important thing is starting.
Remember: there's no "perfect" way to display photos. The best display is the one that makes you smile when you walk past. It's the one that sparks conversations, triggers memories, and makes your house feel like home.
Your photos deserve better than digital purgatory. Give them the spotlight they deserve. Start small if you're nervous – even one printed photo in a nice frame changes a space.
The memories are made. The walls are blank. What are you waiting for?